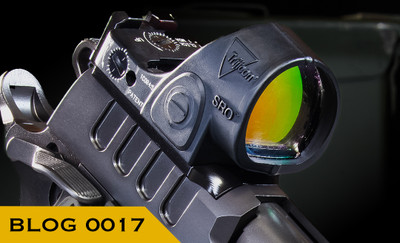


The 1911, a timeless classic in the firearms world, has long been revered for its precision and reliability. While its traditional iron sights are effective, advancements in optics have opened new doors for shooters seeking enhanced performance. Red dot sights have revolutionized the shooting world, offering faster target acquisition and improved accuracy. Red dot sights provide a significant advantage, especially for aging eyes or in high-stress scenarios. This article explores the integration of red dot sights with the 1911, along with installation and usage tips to maximize their potential.
Choose a red dot sight designed for pistols, such as the Trijicon RMR or the Leupold DeltaPoint Pro. Consider size, weight, and battery life when selecting a sight. An overlooked feature is battery access. Removing the optic to replace a battery will affect the optic’s zero. New models have either top access or the more popular side access battery compartments. Other features to consider are size and type of reticle. There are many different offerings. Try to remember the high-stress scenario and keep the reticle simple, a dot. Dot sizes vary, but 2-3MOA is practical and user-friendly.
Adding a red dot to a 1911 typically involves modifying the slide. Manufacturers are recognizing their popularity and offering models that come “optic-ready”. Meaning the slides are pre-cut to easily install the optic. If the 1911 doesn’t come optic-ready, opt for a qualified gunsmith to mill the slide or purchase an aftermarket slide pre-cut for red dots. When installing, start by ensuring all mounting hardware is compatible with the firearm make and model. Clean and degrease the slide cut and optic. Install the optic and tighten to factory specifications using a thread locker. Allow the thread locker to cure for at least 24-hours before test firing. The weakest link in this logistical chain is how the optic attaches to the firearm; take the time to do it correctly.
Focus on the target, allowing the dot to overlay naturally. Train to find the dot quickly by indexing the pistol consistently. Practice with both eyes open to take full advantage of the sight’s capabilities. The beauty of red dot sights is that they really shine under high-stress. Most shooters will be target-focused with both eyes open in a defensive gun use, which are the ideal conditions to best use the optics. In addition, the colored dot offers anytime viewability.
Once installed, thoroughly test and zero your sights at the range. A 10-15 yard zero is a common starting point. Select the zero-distance based on the ability to shoot a 4-inch group. After zeroing, install witness marks on the installation screws to observe any looseness of the optic. Red dot sights will take a bit of adjusting to master. Incorporate dry-fire and live-fire practice sessions regularly to become better acquainted with the new sight system. If there is difficulty finding the dot, place a piece of tape on the front portion of the optic to force the dominant eye to focus on the dot. Wipe down the optic lens regularly and keep it free of debris. Check batteries periodically and replace them every year, regardless of the advertised battery life.
Integrating red dots transforms the 1911 into a modern powerhouse. With proper installation, training, and maintenance, these systems enhance accuracy, confidence, and overall performance. Regardless of the mission, upgrading the 1911’s sights ensures it remains as relevant today as it was over a century ago.